

How to Choose a Shower Chair: 9 Measurements and Safety Checks
A shower chair can look compact in a product photo and still be too wide for the usable shower floor, too tall for the intended user, too shallow for the sitting position, or unstable where the floor curves toward a drain.
The advertised seat size is only one part of the decision. The complete chair, every leg and tip, the bathing enclosure, the access route, and the intended user all have to work together.
This guide explains nine measurements and checks to complete before buying. It is not transfer training or an individualized bathroom assessment. When balance, strength, recent surgery, pain, cognition, or assistance needs affect bathing, a qualified occupational therapist, physical therapist, or other healthcare professional should assess the user and environment.
The short version
Before choosing a shower chair:
- Confirm that a stationary shower chair is the correct product category.
- Measure the usable flat floor area inside the shower or tub.
- Compare the chair's overall width and depth, not just its seat dimensions.
- Verify the seat-height range and the intended user's assessed sitting and standing needs.
- Check seat width, seat depth, drainage openings, arms, and backrest as separate features.
- Confirm that all four leg tips can contact the intended surface simultaneously.
- Check weight capacity separately from product weight.
- Verify the complete assembly, matching leg settings, locks, clips, and fasteners.
- Confirm the approach route, transfer plan, cleaning routine, and available assistance.
Do not buy from one attractive feature or one measurement. A chair can have the right seat width and still fail because the frame is too wide, one tip rests on a drain slope, or the user cannot access it using the prescribed method.
1. Confirm that a shower chair is the correct category
Product names are inconsistent. A listing may use shower chair, bath chair, bath bench, shower bench, or shower stool for products with different structures.
Start by identifying the task:
- A stationary shower chair or stool sits fully inside a compatible bathing area.
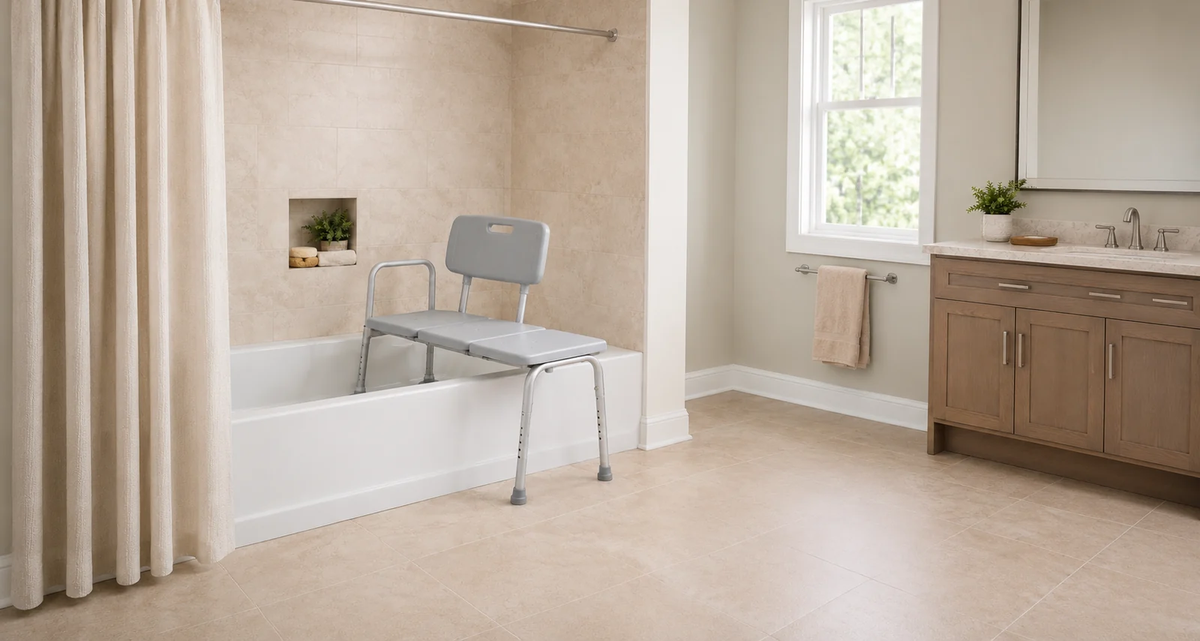
- A bathtub transfer bench spans a compatible tub wall and requires secure support on both sides.
- A mobile shower commode chair uses casters and supports a different, usually caregiver-assisted bathing and toileting routine.
- A wall-mounted fold-down seat depends on the wall structure and installation.
A stationary chair does not help the user cross a tub wall. It is not a step, transfer bench, commode, transport chair, or standing platform.
If the bathing area has a high tub wall, narrow sliding-door opening, large threshold, or transfer problem, choosing a smaller shower chair may not solve the actual access issue.
Review Shower Stool vs. Transfer Bench vs. Shower Commode Chair before comparing individual chair models.
2. Measure the usable bathing-floor area
Do not use the wall-to-wall dimensions alone. A shower or tub can have enough total area but too little flat, unobstructed floor for all four feet.
Measure the usable area after accounting for:
- Curved tub walls and rounded corners.
- Floor slope toward the drain.
- Raised drain covers, channels, and drain lips.
- Door tracks, hinges, and inward-swinging doors.
- Fixed glass panels.
- Faucets, controls, hoses, and handheld-shower brackets.
- Built-in shelves, ledges, and soap trays.
- Grab bars and their required access.
- Mats or floor coverings authorized for the setup.
Record usable front-to-back depth and side-to-side width at the exact level where the feet will stand. Then identify the location of the drain, any abrupt slope, and every obstruction.
Do not place one leg on a curved wall, door track, drain lip, loose mat, or different-height surface. Manufacturer instructions for stationary bath chairs commonly require all four tips to contact the floor simultaneously.
3. Compare overall width and depth—not only seat size
Seat width and seat depth describe the sitting surface. They do not necessarily describe the chair's widest or deepest points.
The complete footprint may be larger because of:
- Splayed legs.
- Wide rubber tips.
- Arms and arm supports.
- Backrest tubes.
- Side handles.
- Adjustment hardware.
- Soap trays or other built-in features.
A current Drive specification, for example, lists a 21.5-inch-wide seat on one shower-chair model. Another Drive model lists a 19.25-inch-wide seat. Those figures do not by themselves establish the complete floor footprint or user fit.
For every candidate, record:
- Overall width at the widest point.
- Overall depth at the deepest point.
- Seat width.
- Seat depth.
- Distance between arms or frame sections, if provided.
- Tip-to-tip footprint at the intended height setting, if the manufacturer provides it.
If the specification omits the complete footprint, obtain the verified dimensions from the manufacturer or authorized seller. Do not assume the chair fits because the seat dimensions fit inside the shower.
4. Evaluate the seat-height range
Seat height affects how the user approaches, sits, and leaves the chair. There is no universal best shower-chair height.
Compare:
- Published seat-to-floor height range.
- Adjustment increments.
- Number and location of adjustment holes.
- Required push buttons, clips, collars, or pins.
- Whether arms or backrest height changes with the seat.
- The user's assessed lower-limb movement, balance, strength, and transfer method.
A seat that is too low can demand more lowering and rising than the user can control. A seat that is too high can create poor foot support or a difficult approach. Total body height alone does not determine the correct setting.
Some current bath-seat specifications provide broad adjustment ranges. One Drive AquaSense model, for example, lists a seat-height range from 14 to 21 inches. That range belongs to that exact product; it is not a recommended range for every user.
Do not create extra adjustment holes, mix leg settings, or extend a leg beyond the permitted position. Adjust only when the chair is unoccupied and follow the exact manual.
5. Check seat width, depth, drainage, arms, and backrest separately
Two chairs with similar overall size can provide very different sitting surfaces and support features.
Seat width and usable opening
Published seat width may not equal the clear space between arms, handles, or backrest supports. Consider the user's body dimensions, clothing, and the approved sitting position.
A wider seat is not automatically a better fit. It may increase the complete chair width or place the arms too far apart for the intended user.
Seat depth
Seat depth is measured front to back. It affects the relationship between the front seat edge, the user, and the backrest. Do not use width as a substitute for depth.
Drainage and surface
Drainage holes can reduce water pooling when they remain open and the product is used as designed. Check that the seat has no cracks, sharp edges, blocked openings, loose padding, or damaged textured areas.
Do not drill new holes or cover existing drainage with an unapproved cushion. A cushion can change height, friction, drainage, and stability.
Arms and backrest
Arms and a backrest may support an approved routine, but they also add width, create transfer boundaries, and require secure attachment. Confirm whether each component is fixed, removable, reversible, or required.
Do not pull on the backrest, use an arm as a grab bar, or lean beyond the permitted position. The exact transfer and support method should come from the manufacturer and the user's professional assessment.
6. Check all four legs, tips, and the intended surface
The chair is only as stable as its complete contact with the floor. A rubber tip labeled non-slip cannot compensate for incorrect placement, damaged parts, soap residue, a steep floor slope, or a missing leg lock.
Before purchase, identify:
- Number and arrangement of legs.
- Tip material and shape.
- Replacement-tip availability.
- Leg angle and footprint.
- Adjustment mechanism.
- Surface restrictions in the manual.
Before every use, the current instructions may require confirmation that:
- All four legs are set to matching permitted positions.
- Every push button or clip protrudes and engages completely.
- Fasteners are present and tight.
- Tips are installed, clean, and undamaged.
- All four tips contact the floor simultaneously.
- The chair does not wobble, rock, or sit out of level.
Do not use the chair if a tip is torn, cracked, worn, hardened, missing, or contaminated in a way that prevents normal contact. Replace parts only with items verified for the exact model.
Never use a shower chair for standing, climbing, or reaching. Wider feet and a published weight capacity do not turn it into a step stool.
7. Verify weight capacity separately from product weight
Weight capacity is the manufacturer's maximum user weight or load for the exact model and configuration. Product weight describes how much the empty chair itself weighs.
Record both values, but do not combine them.
Also confirm:
- Whether the rating changes when arms or a backrest are removed.
- Whether every required fastener and support is installed.
- Whether an accessory has its own load limit.
- Whether the rating applies only at approved height settings.
- Whether the chair is intended for one user only.
A higher-capacity chair is not automatically wider, taller, easier to transfer to, or compatible with the shower floor. A chair can meet the numerical capacity and still fail the user-fit or room-fit assessment.
For the complete distinction, read Product Weight vs. Weight Capacity.
8. Inspect assembly and adjustment requirements
“Tool-free” does not mean “check-free.” A chair assembled without a wrench can still be unsafe if a tube is reversed, a clip misses its hole, or the legs use different settings.
Before buying, review the manual and parts diagram. Determine:
- Number of parts and fasteners.
- Front and rear orientation.
- Arm and backrest orientation.
- Cross-brace position.
- Leg labels and required matching settings.
- Push-button, clip, screw, knob, or collar checks.
- Whether reassembly is required after transport or cleaning.
After assembly, test the unoccupied chair on the intended dry surface. Do not test stability for the first time while the floor is wet or while a person is sitting.
Stop if the chair rocks, flexes unexpectedly, makes a new clicking sound, or has a component that cannot be fully locked. Do not use tape, improvised spacers, mixed hardware, or a different leg to force the assembly together.
9. Confirm the route, transfer plan, assistance, and maintenance
A chair that fits inside the shower may still fail the complete bathing routine.
Map the route from the bathroom entrance to the final chair position. Check:
- Doorway and door-swing clearance.
- Space beside the shower or tub.
- Threshold or tub-wall access.
- Position of grab bars and handheld shower controls.
- Reach to soap and towels without twisting or standing.
- Space required by an assisting person.
- Where the chair will be stored and allowed to dry.
The transfer plan must be appropriate for the intended user and fixture. A stationary chair does not solve a tub-wall crossing problem merely because it fits inside the tub.
Bathroom equipment is one part of a larger environment. The U.S. Department of Veterans Affairs recommends considering a shower seat or tub bench, appropriate grab bars, and non-slip measures rather than relying on towel racks or ordinary furniture for support. The NHS also recommends a home assessment when everyday tasks or fall concerns require equipment or adaptations.
Follow the model-specific cleaning instructions. Rinse permitted surfaces, remove soap residue, inspect drainage openings and tips, and allow the product to dry as directed. Stop use when corrosion, cracks, loose parts, discoloration, mold, or wear cannot be corrected through the approved maintenance process.
Build a complete comparison record
Use the same fields for every candidate.
Product identity
- Manufacturer, model, size, and revision.
- Current manual and parts diagram.
- Shower chair, stool, transfer bench, or another product type.
- Intended placement and approved use.
Bathroom measurements
- Usable floor width and depth.
- Drain location and floor slope.
- Door, track, threshold, and fixture clearances.
- Space required for the prescribed transfer and assistance.
Chair measurements
- Overall width and depth.
- Seat width and depth.
- Seat-height range and increments.
- Clear space between arms or frame parts.
- Complete leg and tip footprint.
Safety and maintenance
- Weight capacity and product weight.
- Leg-lock and fastener system.
- Tip type and replacement part number.
- Arms, backrest, drainage, and surface material.
- Cleaning, drying, inspection, and storage instructions.
If the manufacturer does not publish a dimension essential to the decision, treat that as missing information. Do not replace it with a guess from a photograph.
Stop and reassess when
- The product category does not match the access or transfer problem.
- The complete chair footprint is unavailable or exceeds the usable floor area.
- Any foot would rest on a curve, drain lip, track, loose mat, or different-height surface.
- The chair rocks, wobbles, or cannot sit level.
- The legs cannot be set to matching permitted positions.
- A push button, clip, fastener, arm, or backrest does not lock completely.
- A rubber tip is damaged, missing, worn, or contaminated.
- The intended user cannot access or use the chair through the assessed method.
- The user weight exceeds the exact model's published capacity.
- An unapproved cushion, leg, tip, or accessory is required to make the chair fit.
Do not proceed because most of the measurements work. One failed leg contact, one obstructed transfer route, or one incomplete lock is enough to stop the setup.
Common mistakes to avoid
- Measuring the shower wall to wall instead of the usable flat floor.
- Comparing seat width while ignoring the leg footprint.
- Assuming every shower chair fits inside a bathtub.
- Choosing seat height from total body height alone.
- Mixing leg settings to compensate for a sloped floor.
- Placing a foot on a drain cover, track, or tub curve.
- Assuming rubber tips prevent every slide.
- Treating weight capacity as a stability guarantee.
- Adding an unapproved cushion that blocks drainage.
- Using towel bars, doors, or the chair back as grab bars.
- Standing on the chair to reach an item.
- Using a stationary chair as a transfer bench or commode.
- Skipping the unoccupied assembly check.
Frequently asked questions
Will any shower chair fit inside a bathtub?
No. Tub floors often narrow and curve near the walls. Measure the usable flat area and confirm that every tip can contact the approved surface simultaneously.
What is the best shower-chair height?
There is no universal best height. Compare the product's permitted range with the intended user's assessed sitting, standing, foot support, balance, and transfer requirements.
Should all four shower-chair legs be the same height?
Manufacturer instructions for common adjustable stationary chairs require matching height positions and simultaneous contact. Do not stagger the legs to compensate for a sloped floor unless the exact manufacturer explicitly provides such a procedure.
Are suction cups better than rubber tips?
The appropriate tip depends on the exact product and approved surface. Neither design eliminates the need for correct placement, clean undamaged parts, complete floor contact, and a model-specific inspection.
Do I need arms and a backrest?
That depends on the user's assessed needs and transfer method. Arms and backrests can change usable width, access, orientation, and the chair's overall footprint, so they should be evaluated as structural features rather than assumed upgrades.
Can I put a cushion on a shower chair?
Only use a cushion or pad specifically approved for the exact model. An unverified cushion can change seat height, friction, drainage, and user position.
Does a shower chair prevent falls?
No product can guarantee that. A correctly selected chair may reduce the need to stand during bathing, but the user, transfer method, floor, water, grab bars, assistance, and complete bathroom environment still matter.
Can a shower chair be used as a commode?
Only when the product is specifically designed and configured for that purpose. A standard shower chair should not be modified with a bucket or opening.
How often should the chair be inspected?
Follow the manual's schedule and perform the required checks before use. Reinspect after assembly, adjustment, movement, impact, cleaning, storage, or any change in stability.
Measure the room, chair, user, and routine together
The right shower chair is not simply the narrowest model, the widest seat, or the highest capacity. It must fit the usable bathing floor, provide the assessed seat position, maintain full four-point contact, assemble exactly as instructed, and work with the complete access and assistance plan.
Reject any setup that depends on an uneven surface, mixed leg heights, damaged tips, an improvised accessory, or an unsupported transfer assumption. For DeepTireh product information and support resources, visit the DeepTireh Support Center.


Leave a comment
This site is protected by hCaptcha and the hCaptcha Privacy Policy and Terms of Service apply.